
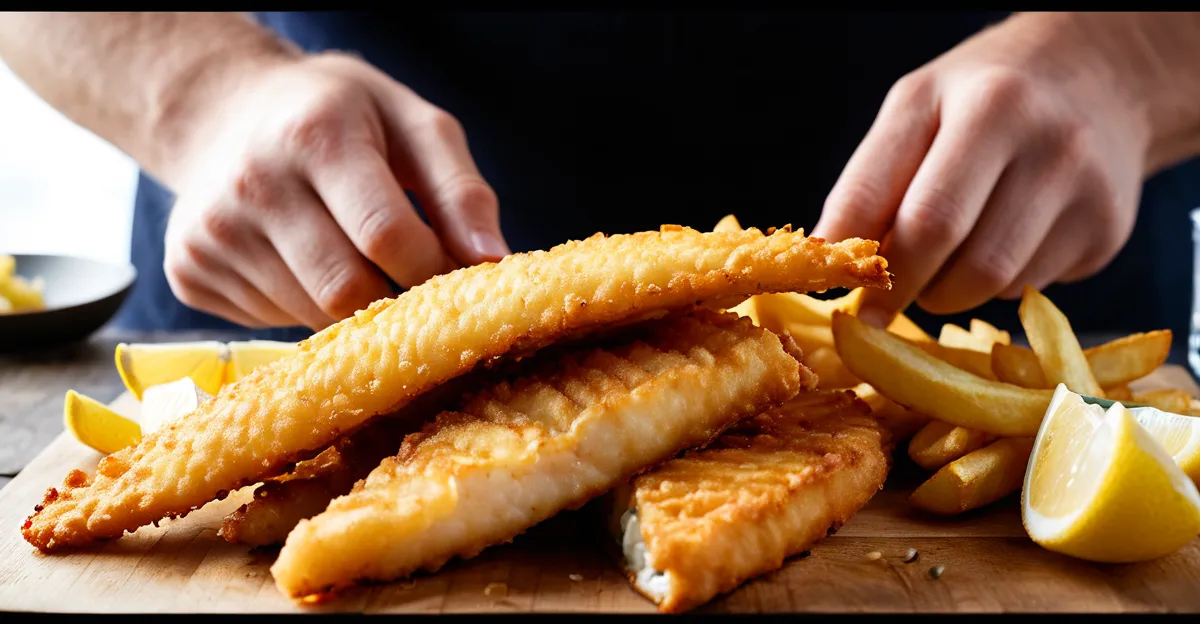
Achieving Crispy, Restaurant-Quality Batter
Creating crispy batter fish and chips begins with choosing the right ingredients. For a light batter, use plain or low-protein flour such as cake or pastry flour, which results in a thinner, crisper coating. Avoid all-purpose flour alone, as it tends to create a denser crust. Incorporating cold sparkling water or beer adds carbonation, promoting air bubbles that make the batter light and crunchy.
Step-by-step, start by sifting your flour to prevent lumps. Gradually whisk in the cold liquid until the mixture just comes together; overmixing activates gluten, leading to a heavy, chewy texture. Once prepared, chill the batter for at least 30 minutes—this resting period is crucial to stabilize the mixture and enhance crispiness during frying.
Have you seen this : What are the key techniques for crafting a traditional Eton mess?
Chefs recommend maintaining a cold batter temperature and ensuring the fish is dry before dipping. This contrast keeps the batter from absorbing excess oil. Additionally, frying immediately after dipping maximizes crunch. Some professionals also add a small amount of cornflour or baking powder to boost lightness. Consistent technique—balancing temperature, batter texture, and timing—makes the difference for that perfect restaurant-quality crispy batter every time.
Choosing the Best Fish for Homemade Fish and Chips
Selecting the best fish for fish and chips is crucial in achieving that authentic taste and texture. Cod and haddock consistently rank as the top choices due to their mild flavor, flaky flesh, and firm texture that hold up well during frying. Both offer a delicate balance between tenderness and bite, which complements the crispy batter fish and chips perfectly.
In the same genre : What Are the Essential Herbs for Traditional British Dishes?
Fresh fish significantly affects the final dish—look for fillets with a clean, seawater scent and translucent flesh. Avoid any fish with off odors or discoloration to ensure quality. When preparing, properly portioning the fillets into even sizes ensures uniform cooking and consistent crispiness.
Cutting techniques matter: trim away excess skin or bones carefully while keeping the fillet intact to maintain structural integrity during frying. A neat, well-portioned fillet allows the light batter to coat evenly, contributing to that coveted restaurant-quality finish.
Expert chefs recommend patting fish dry before dipping to prevent sogginess and improve batter adhesion, which enhances crispness. This extra step is a simple but essential technique for mastering your homemade fish and chips experience.
Mastering Frying Methods and Oil Selection
Choosing the best oil is critical when frying fish and chips to achieve that crispy batter fish and chips standard. Neutral oils with high smoke points like vegetable, sunflower, or peanut oil are ideal. These oils deliver clean flavor and withstand high frying temperatures without breaking down, preserving the batter’s crunchiness.
Maintaining the oil temperature around 175–190°C (350–375°F) is vital. Frying at too low a temperature causes greasy, soggy batter; too high burns the coating. Use a reliable thermometer to monitor the heat consistently. Once plunged into hot oil, the batter’s moisture rapidly vaporizes, creating the signature light batter crust.
The double frying technique is a chef secret for unbeatable crunch. Initially, fish and chips are fried at a lower temperature to cook through gently. After resting briefly, a second fry at higher heat crisps the exterior perfectly, sealing in moisture while forming that distinctive, restaurant-quality crunch.
Other frying tips include avoiding overcrowding the pan, which drops oil temperature, resulting in uneven cooking. Also, fresh oil helps maintain crispness—reuse causes off flavors and soggy texture. Master these frying methods and oil choices to elevate your homemade fish and chips to professional-quality results every time.